CMS Installation
The Designate CMS is a PHP web application which sits on a MySQL database. The PHP / MySQL combination is very popular as a web platform and can be run on Linux or Windows servers.
We have provided some basic instructions for installing your own web server here, but would recommend a Cloud based solution or something managed by an I.T department if the signage application is critical.
Installation
Beyond this point it is assumed that a web server running with PHP and MySQL is available and that the compressed archive (ZIP or Tarball) of the CMS installation package has been transferred to the server.
The basic process is as follows:
- Download and extract the archive
- Starting the Installation
- Pre-requisites
- Creating the database
- Database details
- Starting the Installation
- Final Configuration
- Complete
Download and extract the archive
The CMS archive contains a sub folder called Designate-server-1.7.8, the contents of this folder should be copied into the appropriate web serviceable location on your web server. In the simplest of web server configurations the name of this folder will be the name of the URL you use to access the CMS. For example: http://localhost/Designate.
The extracted archive should look like the below screen shot:
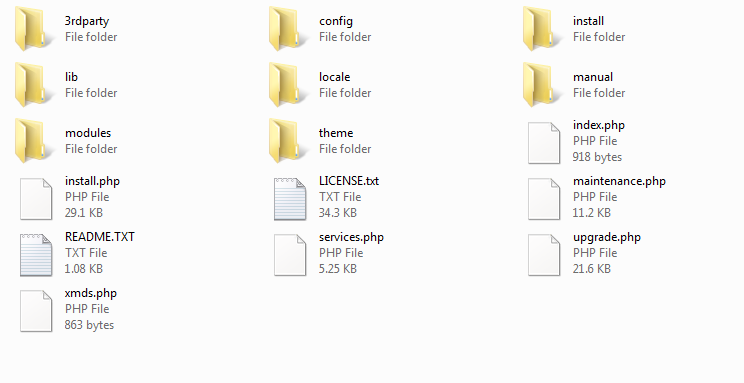
A folder will need to be created for the Designate library. This will be used to store images, videos and other file based media that is uploaded to the CMS. _Subsequent steps in the installation will require this information.
Starting the Installation
Navigating to http://localhost/Designate will automatically start the installation.
The installation is in a wizard format that contains 6 steps in total. The wizard will guide the installer through the process of installing Designate.
Step 1 - Pre-requisites
The installer contains a detailed check list of all the items required for a successful installation. Each item will have either:
- A tick - the item is present and correct
- An exclamation mark - the item is present but may not be configured correctly.
- A cross - the item is missing.
Any items with an exclamation mark or a cross should be addressed and the retest button used to run this step again.
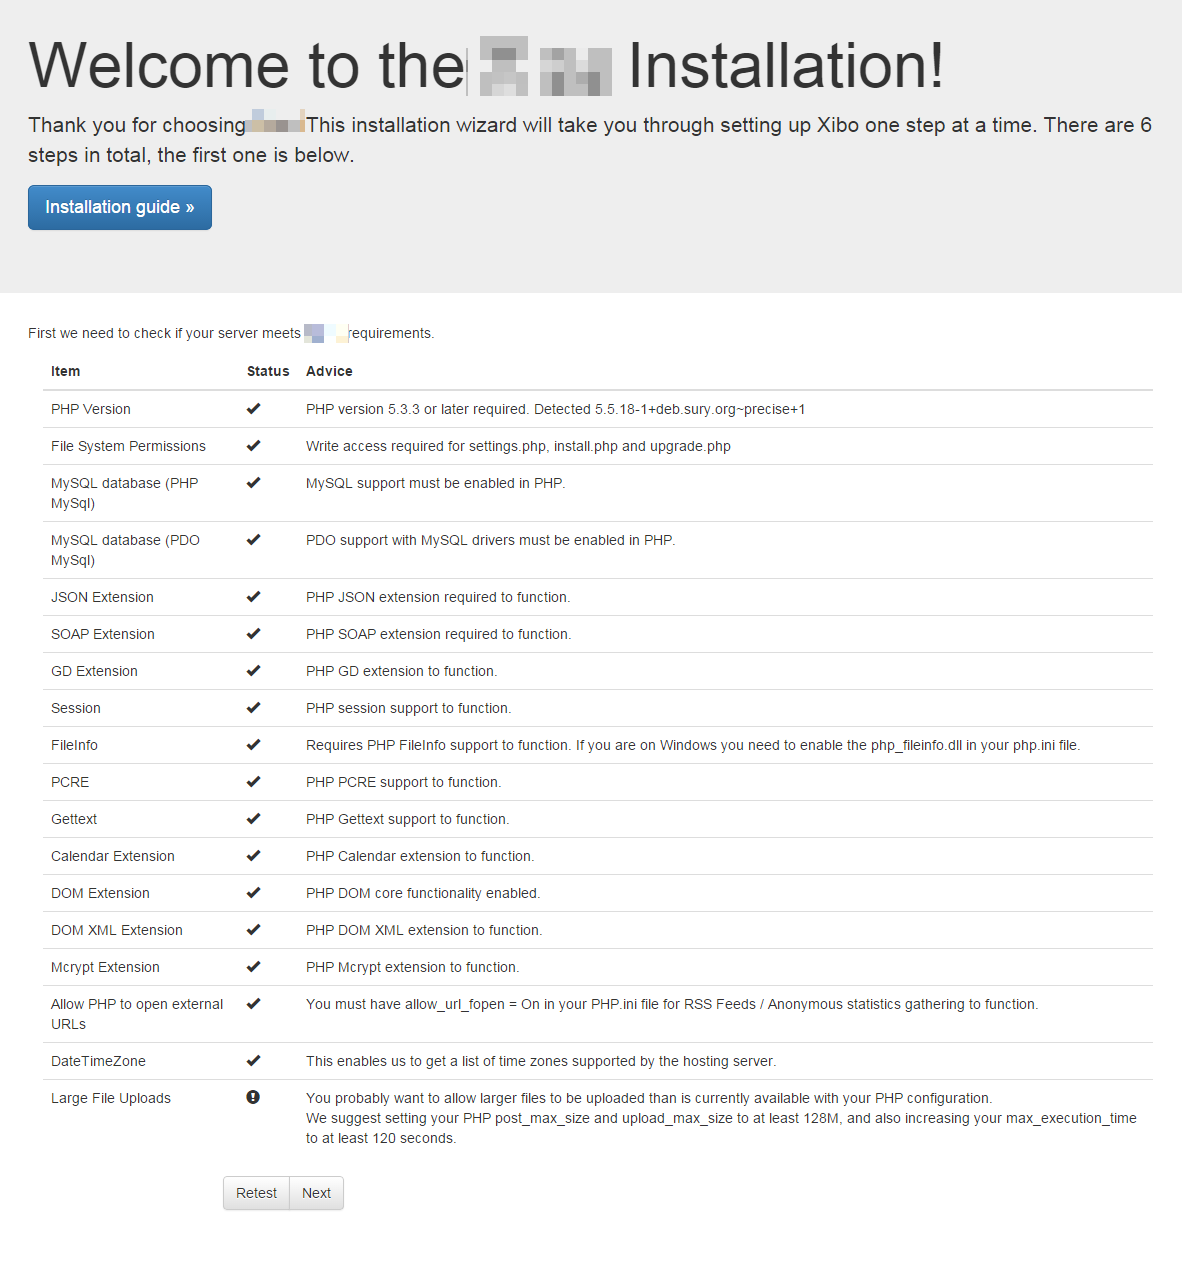
The most common problems here are missing PHP modules, configuration of PHP settings and file permissions issues to the library.
Once all the items are ticked press next to advance.
Creating the database
The CMS can install into a new database, or an existing one. We recommend a new database.
Designate does not prefix its table names and may conflict with content in an existing database.
The choice for a new or existing database can be made by switching between the two available tabs.
Database Details
Whether you chose an existing database or a new one, the installer will need to collect some information about that database to allow the CMS to connect, read and write.
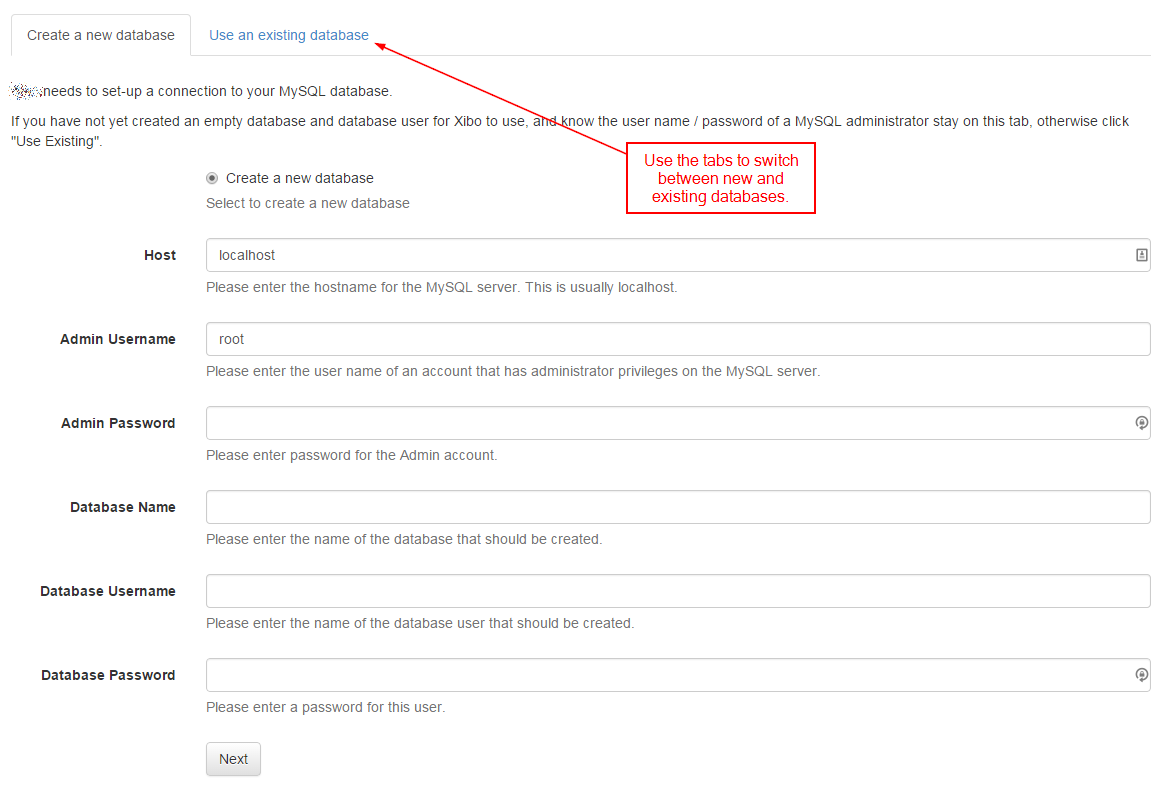
The installer will need the following information:
Host The host name for your MySQL installation - in the majority of cases this will be "localhost".
Admin Username The "root" user name for your MySQL installation. This is only used for the installation and is only required if you have asked the installer to create a new database.
Admin Password The "root" password. This is only used for the installation and is only required if you have asked the installer to create a new database.
Database Name The name for the CMS database.
Database User name The user name for the CMS to use to connect to the database - usually this can be the same.
Database Password The password to use to connect to the database.
Start the Installation
The installer will now create / populate database for Designate. You should see a series of dots appear on the screen as this happens. It can take a few moments to complete. Assuming everything went well, click "Next".
If there are errors at this point, please see the troubleshooting section of this manual.
Admin Password
Each installation will require at least one "Super User" level Administrator to manage the system, apply upgrades and configure the advanced settings. The installer will prompt for the creation of this user at Step 3.
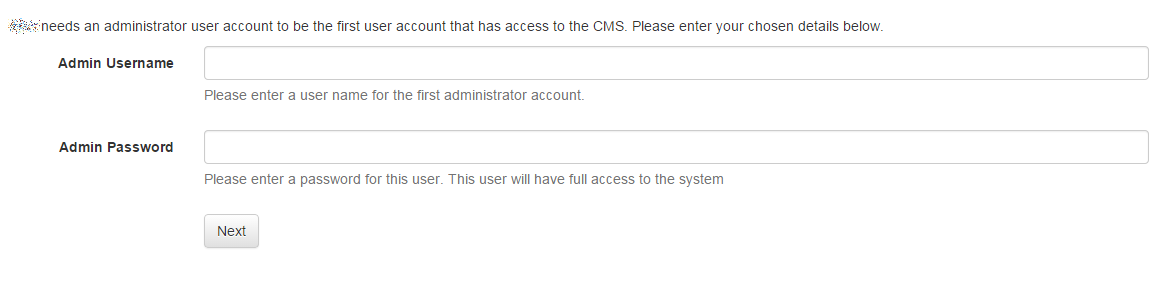
This user name and password should be kept safe as it will be required when the installation is complete.
Settings
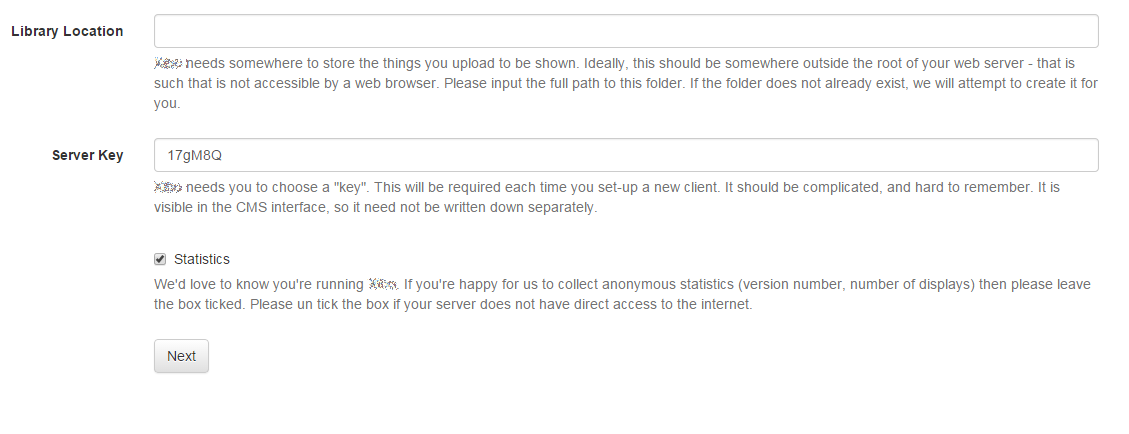
The next screen deals with configuring Designate. The first box asks for the location that Designate should store the media you upload. We created a folder for this earlier, so enter that folder here e.g /home/Designate/library.
The next box asks for a CMS key - this key is used to authenticate Displays with the CMS and should be something obscure.
The final tick box asks if it's OK to send anonymous statistics back to the Designate project. We would be very happy if you did!
Complete
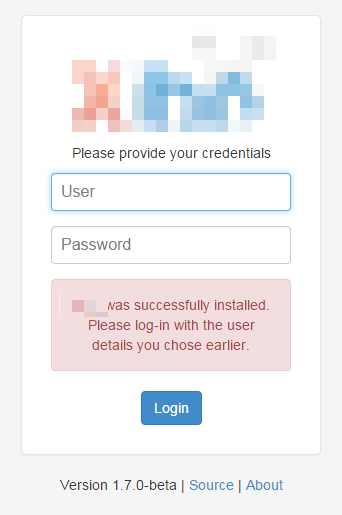
The installation is now complete and the system is ready to log in.